Whether it is a cellular, a smartphone or a digital/web robot, here is everything you need to know about its installation
Note that this procedure is only valid for the latest kapptivate robots. If you have to install a previous version of our robots, please contact our support.
Step 1 - Network prerequisites
Step 2 - IP configuration
First of all, make sure you have the following items:
- A USB keyboard
- A USB mouse
- A screen connected to an HDMI cable
- Credentials for the robot
- All the network prerequisites for the network setup:
- Static IP
- Mask
- Gateway IP
1 - Connect the keyboard, mouse and the HDMI cable to the back of the robot.
2 - Turn on the robot using the front button.
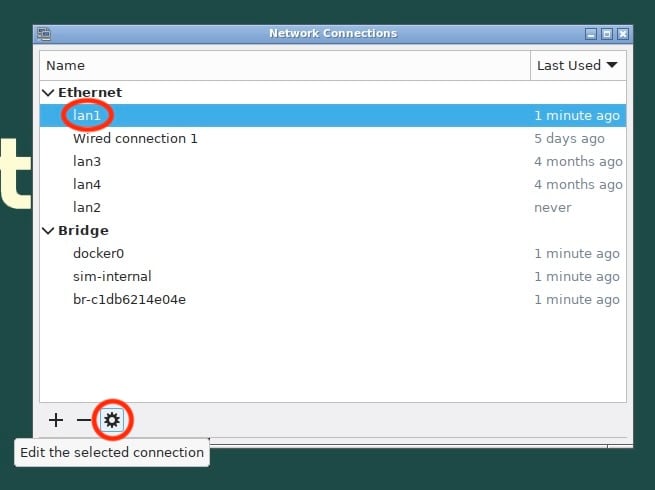
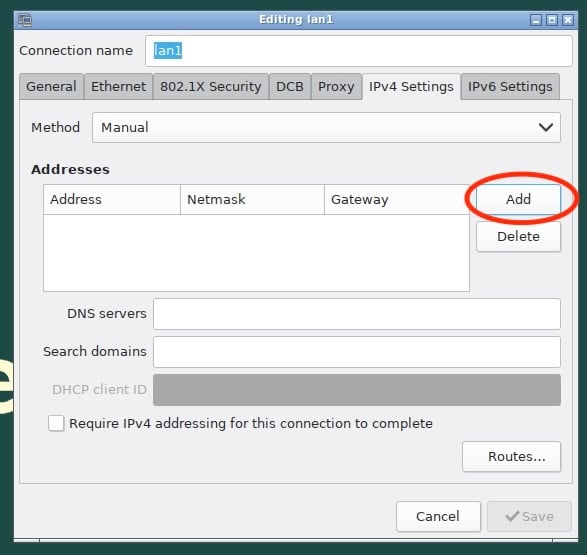
3 - Click on the network configuration icon and select "Edit Connections".
Please be aware that the network name in this case is "lan1" (as indicated in the image above). However, your network name may vary (e.g. "Wired connection 1"), so be sure to configure the network with the corresponding name as shown.
4 - Select "lan1" and click on "Edit the selected connection".
5 - Go to the "General" tab.
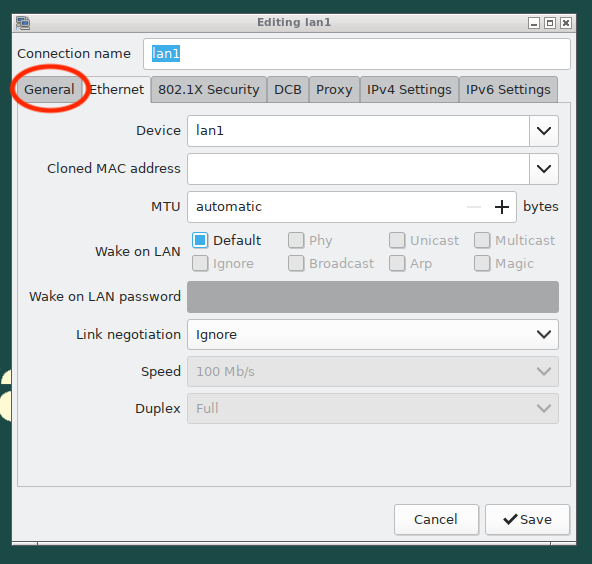
6 - Make sure that the "Connect automatically with priority" box is checked and that the value is "-999".
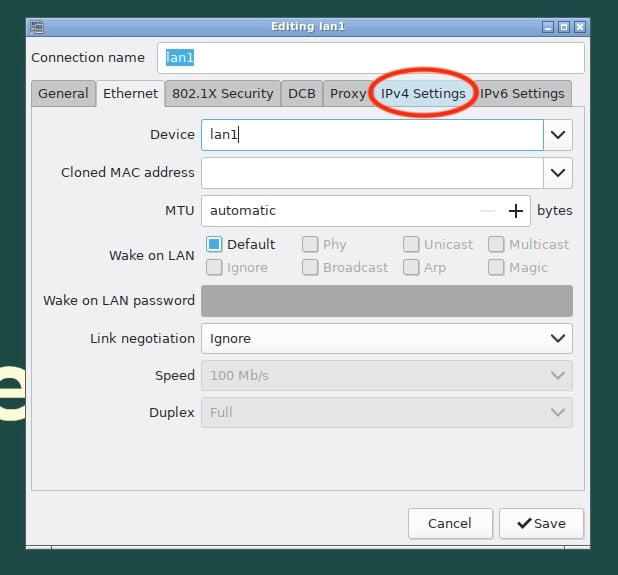
7 - Go to the "IPV4 Settings" tab.
8 - Click on "Automatic (DHCP)" and select "Manual".
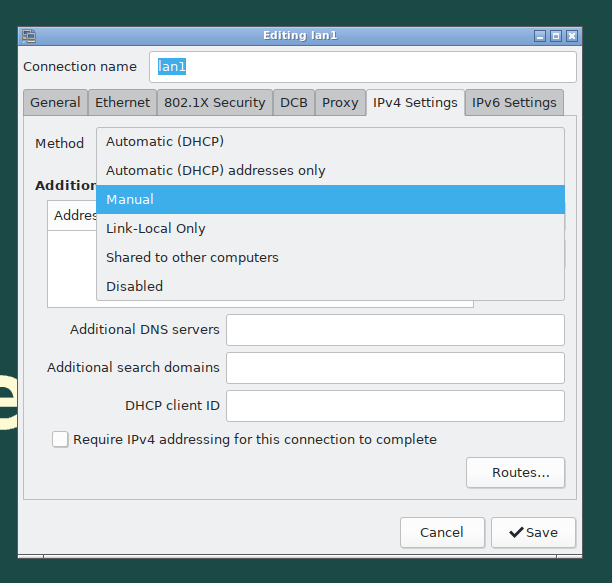
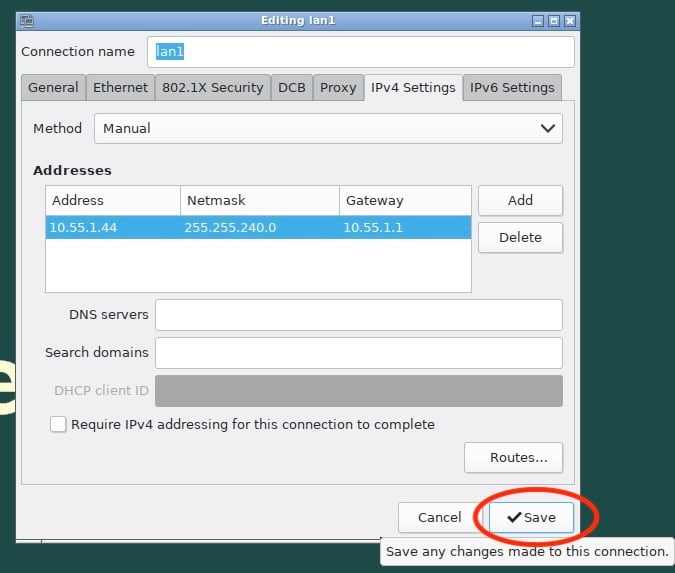
9 - Click on "Add" and configure the IP address, gateway and mask for this robot according to the instructions of your IT department. If needed, add the DNS server(s) IP(s) in the "DNS servers" field
10 - You can then click on "Save".
Make sure that the network cable is plugged to the port labelled "1" at the back of the robot.
Here is how the ports are numbered:
Step 3 - Android smartphone configuration (smartphone robots only)
- Turn on the smartphone.
- Select the language and destination country.
- Do not configure any password to lock the phone.
1 - Open the "Settings" app then select :
- Apps
- Choose default apps
- Browser app
2 - Select "Chrome" (install the app if not already on the phone).
3 - Go back to the "Settings" main menu then select "About phone" -> "Software information"
4 - Click multiple times on “Build number” until developper mode is activated.
5 - Go back to the "Settings" main menu then select "Developper options" and change the following options:
6 - Go back to the "Settings" main menu then select "Battery and device care". Click on the  icon and choose "Automation". Change the following options:
7 - Go back to the Battery and device care menu then click on Battery. Click on Background usage limits and disable "Put unused apps to sleep".
8 - Go back to the "Battery" menu then click on "More battery settings". Change the following options:
9 - Go back to the "Settings" main menu then select "Software update". Disable "Auto download over Wi-FI".

10 - Connect the smartphone to the USB hub (disconnect and connect again if already connected). When a popup appears, tick "Always allow from this computer" and press "OK".
- Turn on the smartphone.
- Select the language and destination country.
- Do not configure any password to lock the phone.
1 - Open the "Settings" app then select :
- General
- Software update
- Automatic updates
2 - Disable all the "iOS Updates"
3 - Go back to the "Settings" main menu then select "Display & Brightness". Click on "Auto-Lock" and select "Never".
4 - Go back to the "Settings" main menu then select "Safari". Scroll all the way down and click on "Advanced", then enable "Web Inspector".
Make sure that the smartphone is connected to the internet (via wifi or via mobile network) otherwise it will not show up in kapptivate. iOS devices need certificates to be able to work with our software and to verify these certificates the device needs to have an internet access.
If your iPhone is on iOS26, go to "confidentialité et sécurité" then click on "accessoires filaires" then select "toujours autoriser".
5 - Connect the smartphone to the USB hub (disconnect and connect again if already connected). When the popup asking to trust the new computer shows up, select "Trust".
6 - If any other popup or message show up on the screen, please select any option to close it.
If it is a new iPhone that has never been used with kapptivate it needs to be registered on the Apple website to be able to perform automated testing. Otherwise, the phone will not show up / show up correctly on kapptivate. Please contact our support team so that they can launch this registration process with Apple. It usually takes between 24 and 72 hours for the phone to be registered.
Note that in order to test your mobile apps, you need to have a smartphone with a supported version of iOS or Android. You can find the list of these versions in the following article : Supported iOS and Android versions for kapptivate